Next generation video transcoding via graphics accelerator card with Callaba Cloud

What is transcoding and why do you need it?
Transcoding is the process of conversion from one digital format to another. It is vital nowadays to transcode your video stream so that your audience can watch it on a large variety of devices : modern powerful computers, old and slow machines, tiny smartphones, tablets, etc.
Advantages of GPU accelerated transcoding
- Using VT1 AWS instances with GPU transcoding allows to handle more streams at the same time, compared to other AWS instances. Choosing VT1 instance for a re-streaming purpose can help to save money on hardware.
- GPU transcoding provides a better quality picture with lower latency, compared to CPU transcoding.
- GPU transcoding allows way less CPU resource consumption. We’ll illustrate that in the next section.
GPU vs CPU transcoding
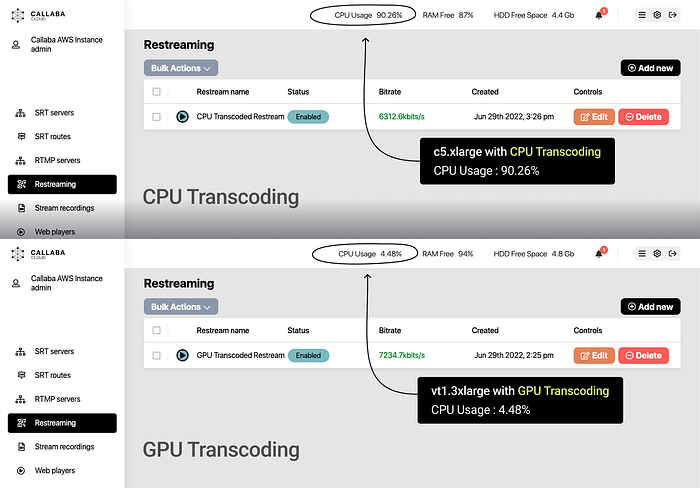
To illustrate by how much less the GPU transcoding loads processor, we took a 1920x1080 / 30fps video stream, transcoded it into1280x720 / 30fps and sent it to YouTube.
CPU transcoding :
c5.xlarge with CPU transcoding had CPU usage at 90.26%
GPU transcoding :
vt1.3xlarge with GPU transcoding had CPU usage at 4.48%
How to set up GPU accelerator card transcoding
1. Register or log in to the AWS Console.
2. In this tutorial we are going to use VT1-type of instances.
This means that even if you have any other instances with Callaba Cloud deployed, we will not use them in this tutorial. We are going to launch a brand new VT1 instance.
Open EC2 Console.
Select your preferred region and go to Instances.
3. Click “Launch instances”

4. Create a Name for your instance

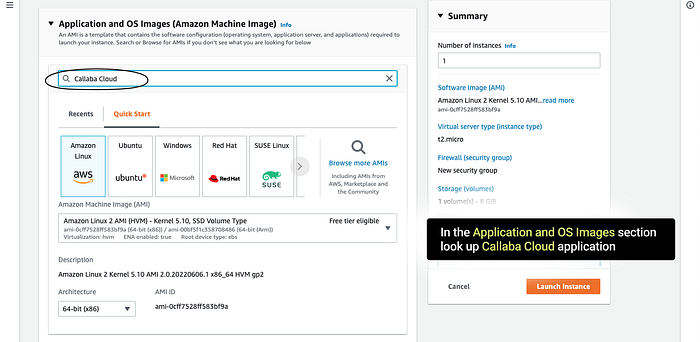
5. In the Application and OS Images section look up Callaba Cloud Live Streaming
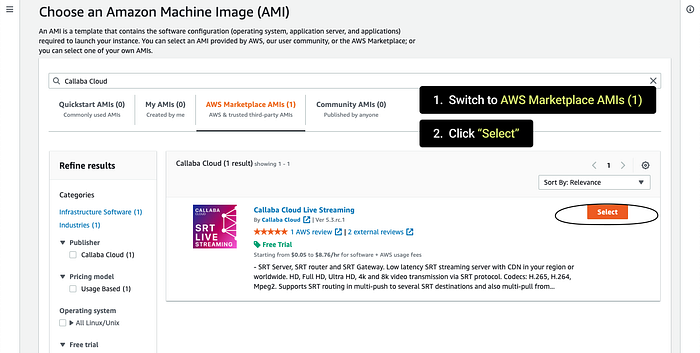
6. Switch to the AWS Marketplace AMIs
Click “Select”
Then “Continue” and “Confirm Changes”


7. IMPORTANT
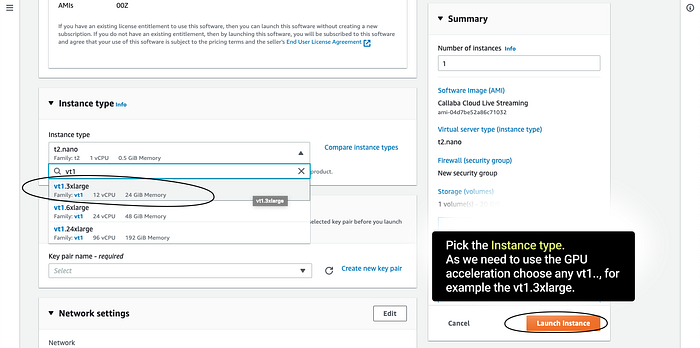
Pick the Instance type.
As we are going to set us GPU transcoding via accelerator cards, pick any VT1 type instance.
In our example we are using vt1.3xlarge.
8. Create a Key pair by clicking “Create new key pair”.
Or choose an existing one if you already have it.


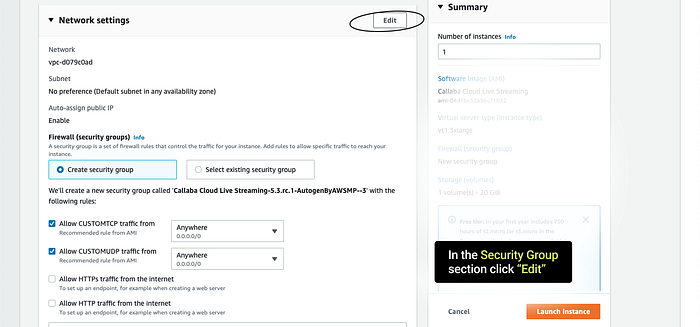
9. In the Security Group section click “Edit”
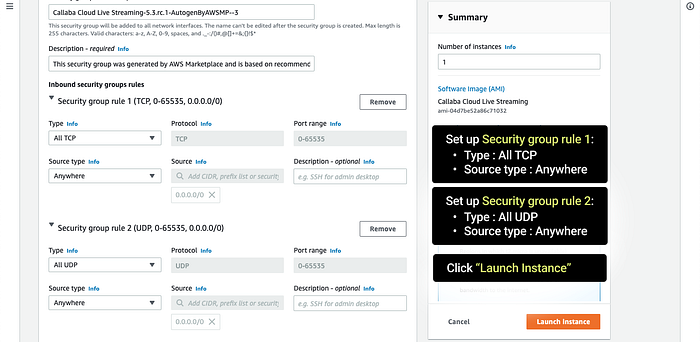
10. Set up Security group rule 1 :
Type : All TCP
Source type : Anywhere
Set up Security group rule 2:
Type : All UDP
Source type : Anywhere
Click “Launch Instance”
11. Next, you’ll see your instance launching.
Wait for a couple minutes until the Status check changes to 2/2 checks passed.

12. ATTENTION!
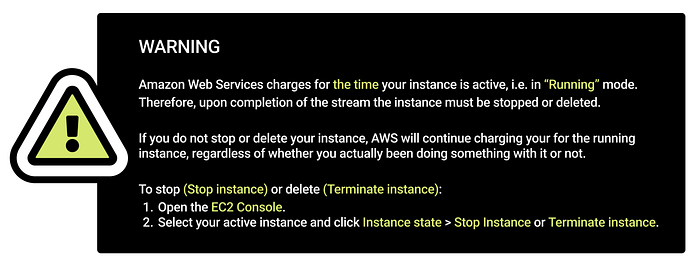
Make sure you know how to Stop or Terminate the resources you’ve been using upon completion of your tasks.
AWS and other cloud providers charge for the time when these resources are “Running”.
Technically speaking, if your instance (or any other resource) is active, it means you are still taking this resource from AWS pool. AWS does not check whether you are actually doing something with the resource.
If you have not stopped the resource and it is running — you are using it and you are being charged accordingly.
Always make sure to stop or delete your instances and other resources when they are no longer needed.
This applies to Instances, CloudFront distributions, Elastic IPs and everything you are renting on AWS — make sure you remove or turn it off when its not needed, so you won’t pay for something you didn’t actually use.
Now that you have been warned, let’s continue.
We put this warning in the beginning of our tutorial, so that nobody will miss this information.
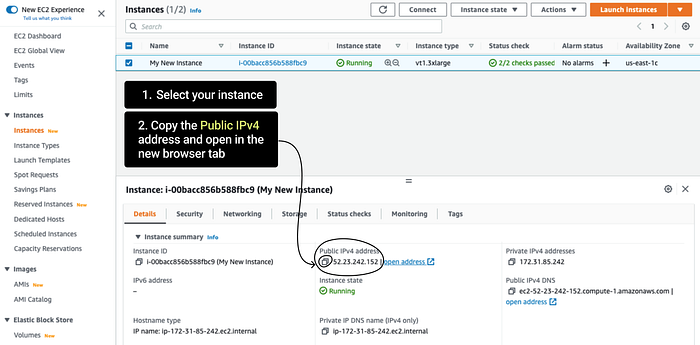
13. Select your instance. You’ll see some data below.
Copy the Public IPv4 and open it in the new browser tab.
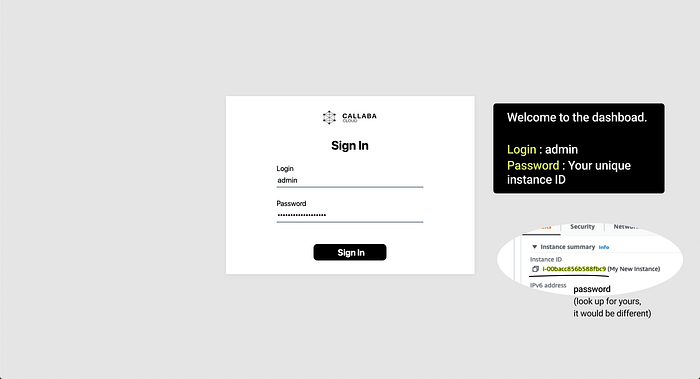
14. You’ll see Callaba Cloud’s dashboard login page.
In case if you see the browser’s warning that the connection is insecure, open the page anyways.
Now you need to log in.
Login : admin
Password : unique ID of your instance (you can copy it in the AWS Console in the neighbouring browser tab).
14. Welcome to the dashboard.
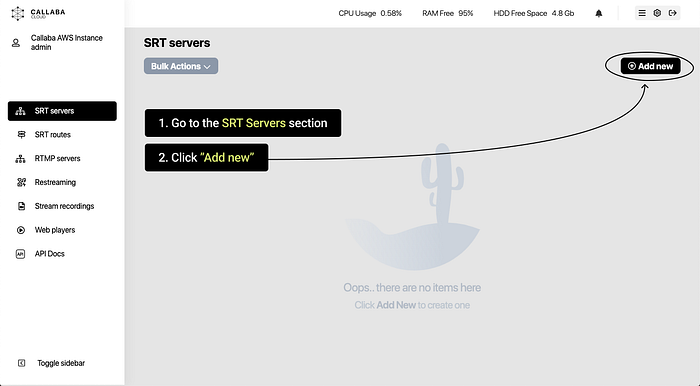
Go to the SRT Servers section.
Click “Add new”
15. Create a Name for your server.
Click “Save”

16. On the SRT Servers listing page, click “Info” on your newly created server.
Now we are going to set up a stream to our server. In our example we are going to use OBS Studio software and we’ll send our stream via the SRT Publisher URL.
Copy SRT Publisher URL

17. Open OBS Studio.
Click Settings > Stream
In the Server field paste the SRT Publishing URL
Click OK

18. If everything is done correctly, you will see the bitrate of the stream in the bottom right corner of the screen. That means we are sending the stream to our newly created SRT server.

19. Now that our stream is coming to our server, we will set up a re-stream and simultaneously we will set up transcoding for it.
You can send your re-stream anywhere, to a social media account that allows live-streaming or to a custom destination.
Go to Restreaming section
Click “Add new”

20. In the creation page
Create a Name
SRT Server : Choose the SRT server you’ve just created
Output Stream URL : paste your destination URL
RTMP Stream Key : paste your key
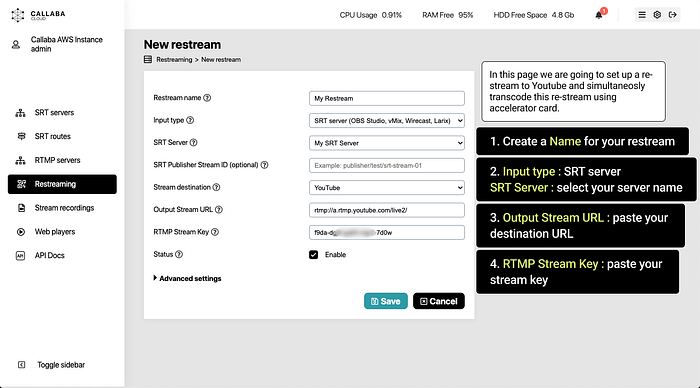
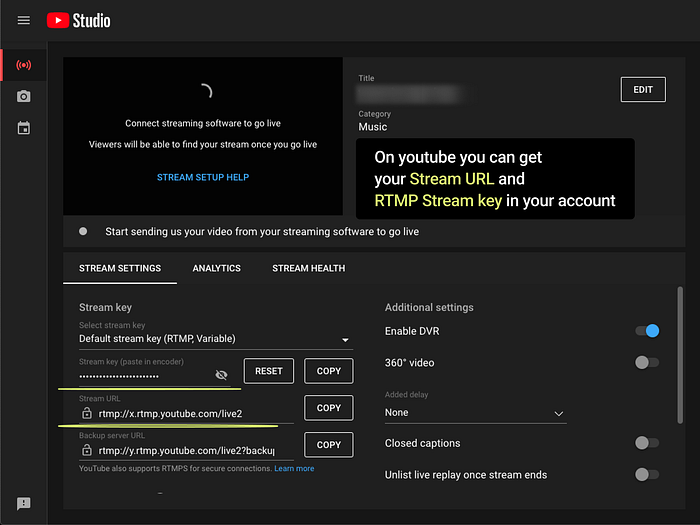
In this example we are creating a re-stream to YouTube, so we copied the RTMP Stream Key and the Output Stream URL from the Youtube studio.
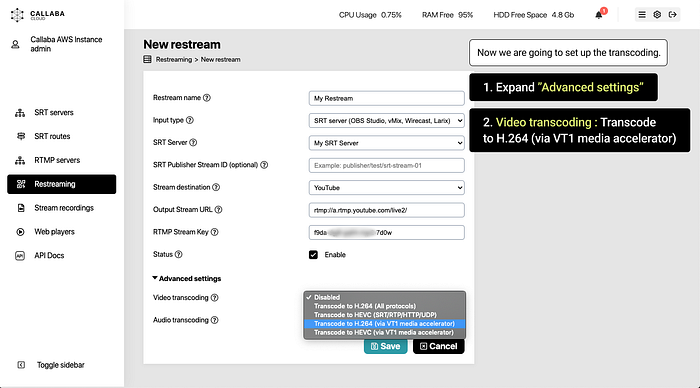
21. Now we are going to set up transcoding.
Expand the “Advanced settings”
Video transcoding : Transcode to H.264 (via VT1 media accelerator)
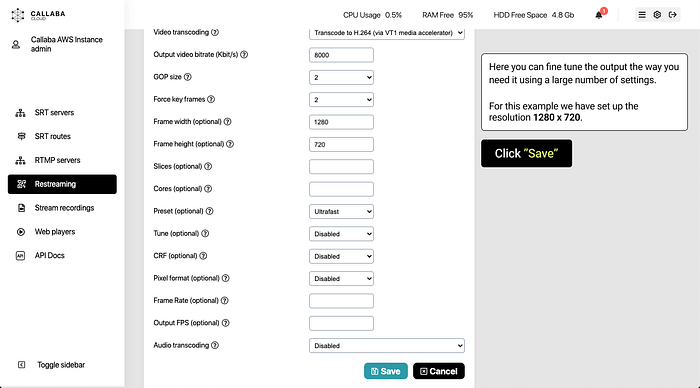
Scroll down, you’ll see quite a number or settings that allow to fine tune your output the way you want it.
For this example we are going to change the resolution to 1280 x 720 (Frame width and frame hight settings).
Click “Save”
22. If everything is done correctly, you will see the bitrate of your transcoded re-stream going to the destination you’ve specified.
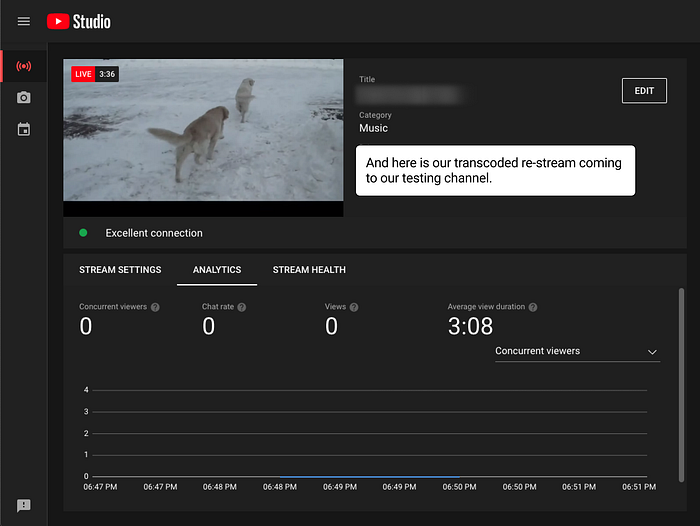
In our example we are sending our stream to Youtube, so we’ll also see our stream playing there.
Oh, and as you can see, the CPU usage is only 3.02%.

Our transcoded re-stream coming to Youtube (a testing channel).
This is the end of our tutorial about GPU transcoding.
If you have any questions, please contact us at: [email protected]
We will respond to you within 48 hours.
Happy streaming!
Related articles :
How to launch Callaba Cloud Live Streaming
How to start streaming in OBS Studio over the SRT Protocol
How to multi-stream from OBS Studio to Twitch, Youtube and Facebook
How to multi-stream from Wirecast to Twitch, Youtube & Facebook
How to set up geo-distributed routing of video streams using SRT protocol and Callaba Cloud


