How to set up a Load Balancer on AWS
In this tutorial we are going to embark on a journey of setting up a Load Balancer on AWS.
Load Balancer does exactly what it says it does — it balances the load between your Callaba instances to ensure that none of the servers get overloaded with requests and all of your viewers can receive the video content without any issues.
This tutorial will take 10–15 minutes to complete.
Before you begin
Before you begin, please ensure that you have created and configured all of your instances. Keep them running for the the setting up period.
Let’s go!
1 . Open EC2 Console.
Make sure that the region selected in the top panel is the same region that you have your instances in.
Navigate to Load Balancing >>> Load Balancers
Click “Create load balancers”

2. Select Application Load Balancer
Click “Create”

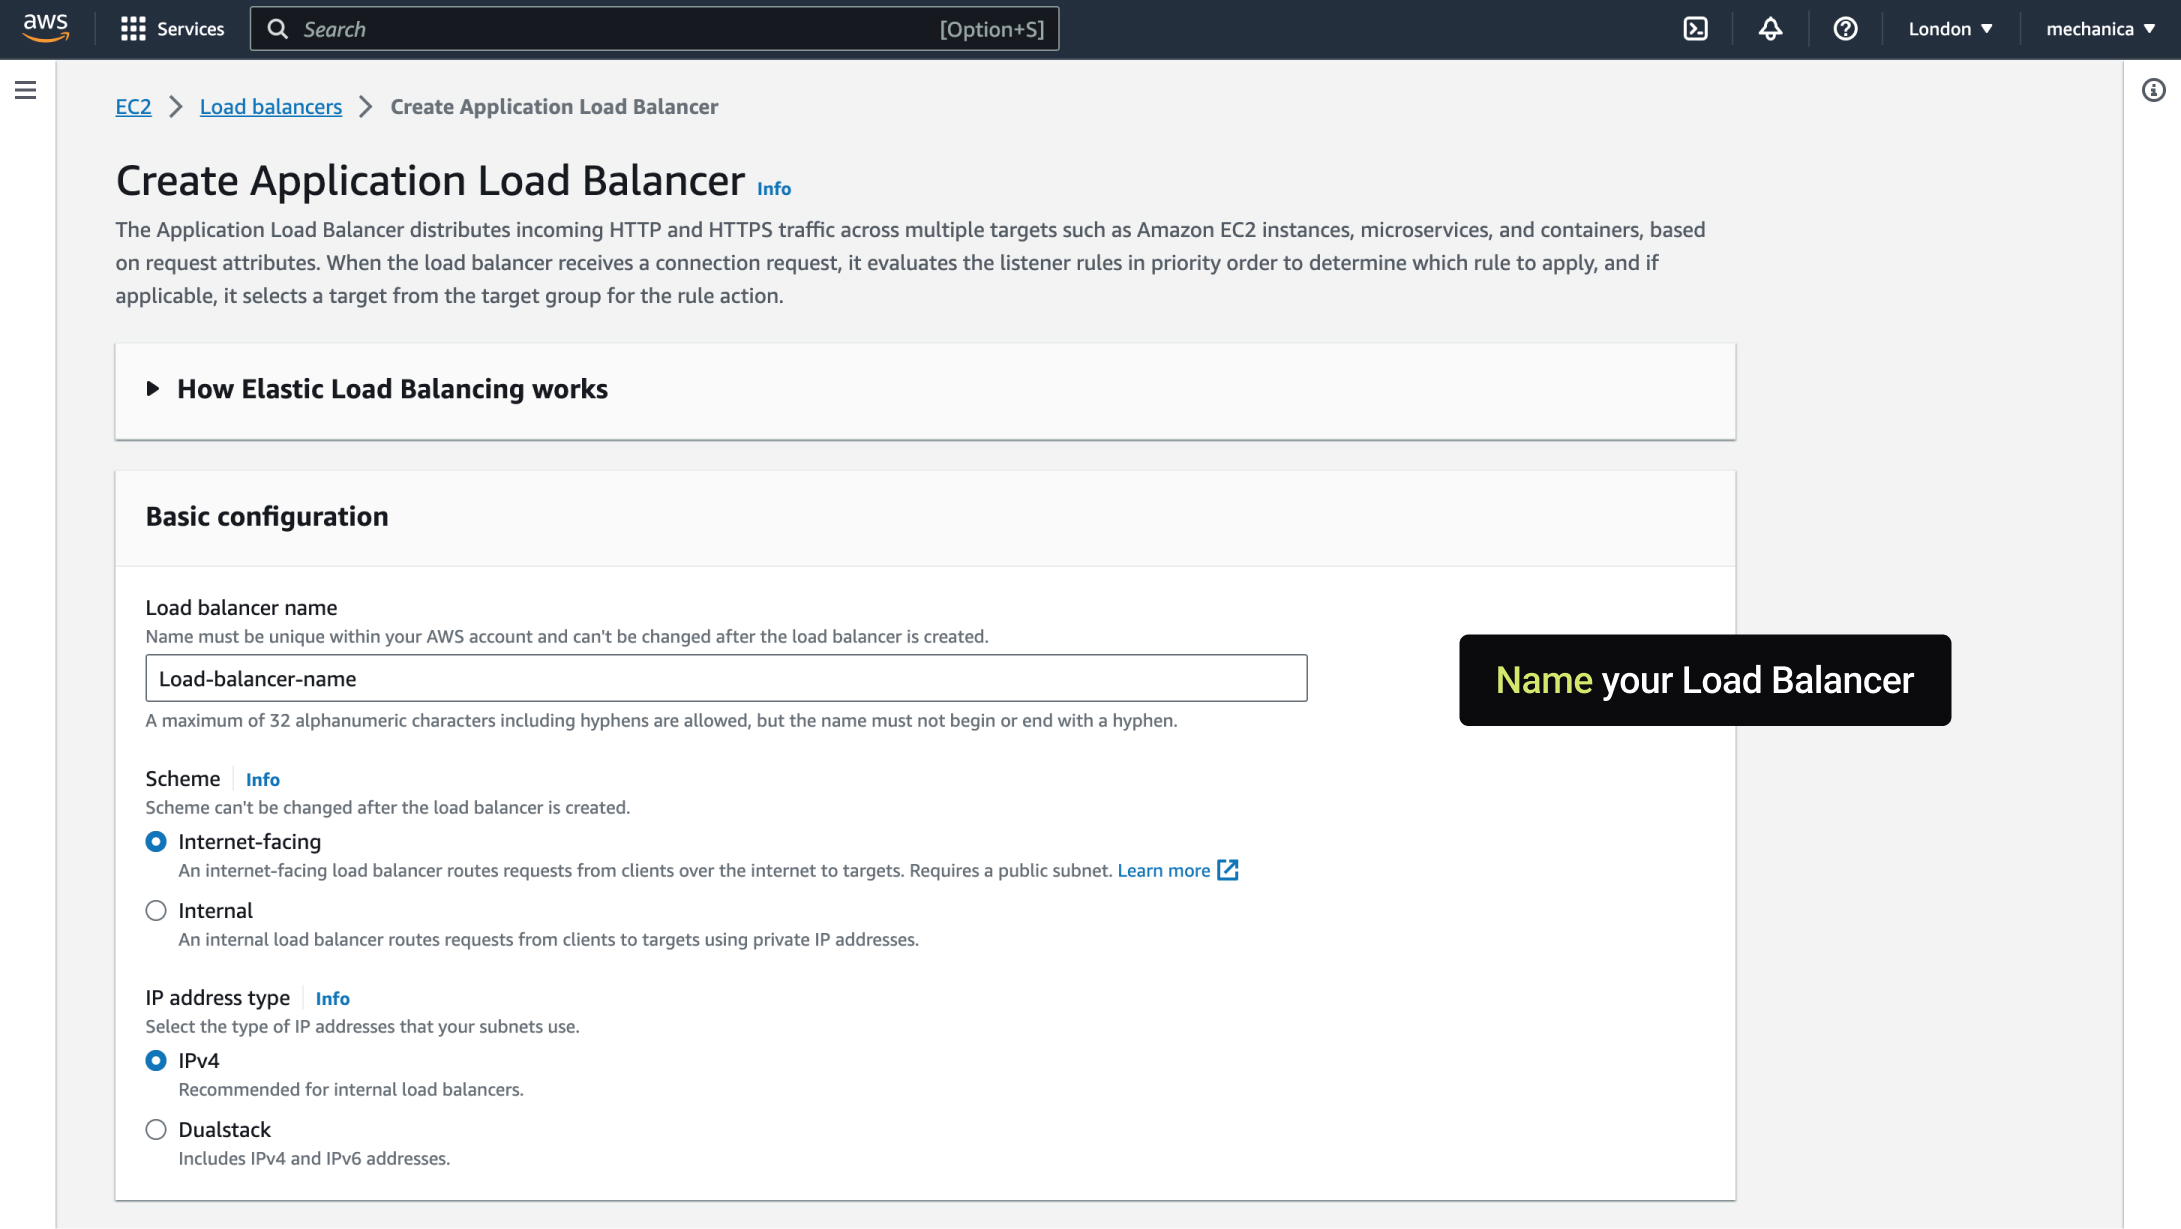
3. Name your load balancer
4. Network mapping
Select at least two Availability Zones.
Important! Make sure that they are the same zones where your instances are. Leave Subnet settings as they are.

5. Security Groups
Default security group will work just fine in most cases. In some cases some adjustments might be needed.

6. Listeners and routing
Click “Create target group”
Please make sure you have your instances set up and running before you get to this step.

7. Create target group >>> Specify group details
In the new window that opens, let’s create our target group.
Target type : Instances
Target group name : Name your target group

8. Health checks
Unfold Advanced health check settings

9. Set health check parameters
Healthy threshold : 3
Unhealthy threshold : 2
Timeout : 3
Interval : 5
Click “Next”


10. Register targets
Select your instances, then click “Include as pending below”

11. Click “Create target below” (or “Register pending targets”)

12. Go back to the Load Balancer creation tab and the Listeners and routing section.
Click Update icon, then select your newly created target group.

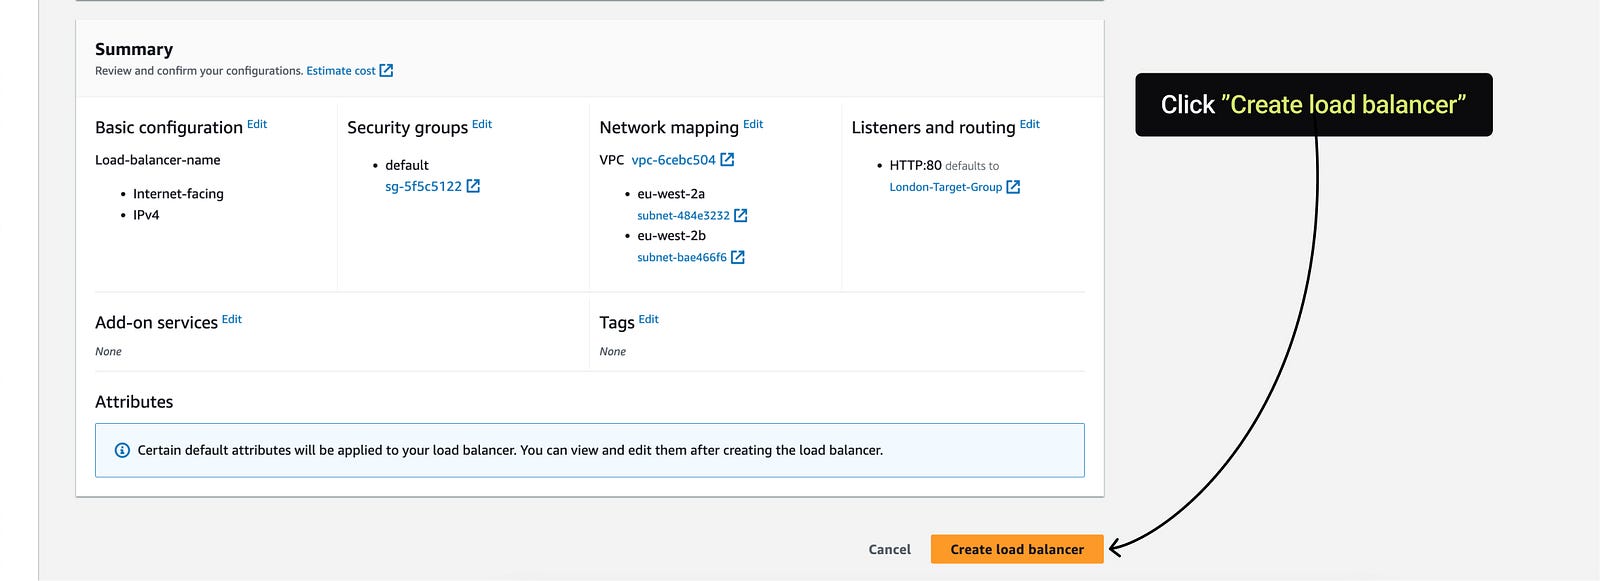
13. Click “Create load balancer”.
You’ll see your Load Balancer being created.

14. In EC2 Console, navigate to the Target Groups
Select your target group
Open the Attributes tab
Click “Edit”

15. Edit target group attributes
Load balancing algorithm : Least outstanding requests
Stickiness : ON
Click “Save”

This is the end of this tutorial.
If you have any questions, please contact us at: [email protected]
We will respond to you within 48 hours.
Happy streaming!
Related articles :
How to launch Callaba Cloud Live Streaming


